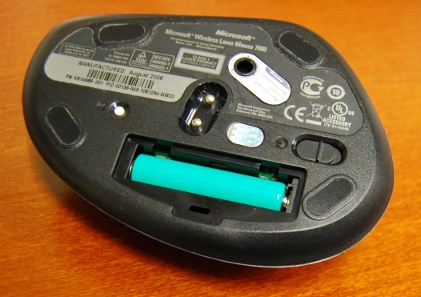
Ran into a situation with a Microsoft Wireless Laser Mouse 7000 that also seems to plague the Wireless Laser Mouse 8000. When placing the Laser Mouse on its charging cradle, the LED on the top of the mouse slowly flashes green for a few seconds, as if it was successfully charging the NiMH battery inside, but then switches to rapidly flashing the LED red.
Taking the rechargeable battery out also results in the flashing red LED. So, the battery is clearly not being recharged. This is further corroborated by the short battery life.

I saw online that some people have found some sort of button underneath the battery and that it’s not being depressed. However, the mouse I was having problems with did not have such a button. There is a small hole under the battery, but no switch or button in the hole.
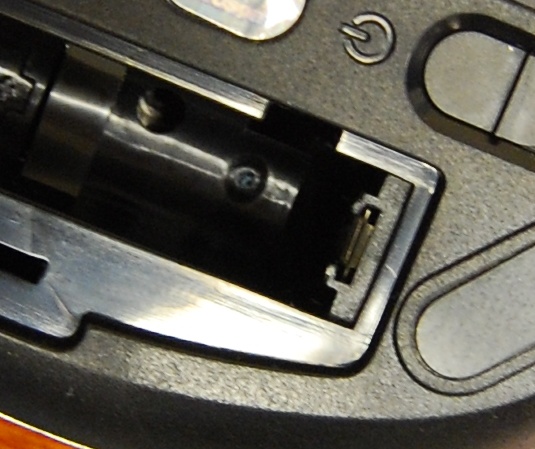
Upon further investigation, I noticed that the positive metal plate in the battery compartment of the mouse has two plastic rails holding it in place.

When putting the battery inside, the rails tend to press back against the top of the battery such that the battery’s tip doesn’t make good contact with the metal. Since the metal plate is tapered inward, it only makes reliable contact with the battery when the battery is pushed all the way down into the compartment.

As a result of this plastic getting in the way and preventing the battery from making contact with the positive conducting plate, of course it can’t recharge. It also explains why it only charges for a few seconds–just until the battery slips out of position and loses contact. However, the fix for this recharging problem is rather simple.

- Cut a small piece of paper a little shorter than the length of the battery and about twice as wide
- Fold the paper in half to achieve a thickness of two sheets of paper
- Place the battery into the battery compartment
- Put the paper on top of the battery
- Close the battery cover
The cover should go on snugly so that it firmly presses the battery into the compartment. That will enable the positive tip of the Laser Mouse’s battery to stay in contact with the positive conductor plate. If it doesn’t press firmly enough, add one more sheet that’s half the width of the first one (for a thickness of three sheets).
After applying this little fix, the problem mouse’s LED properly throbs green and charges up completely.
(Update: Added photos)
